A Guide to Setting Up Your Residential RO System
How Does a Residential RO System Work?
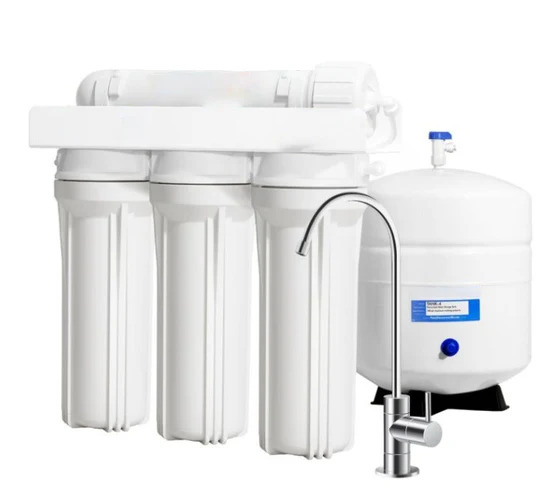
A Residential RO system works by utilizing a series of filters to purify water. The process begins with a pre-filter that removes larger particles like sediment and debris. Then, the water is forced through a semi-permeable membrane that separates impurities such as lead, chlorine, and bacteria from the clean water molecules. This purified water is collected in a storage tank, ready for consumption.
The RO system also includes a carbon filter to eliminate any remaining odors or tastes in the water. A final post-filter ensures that any lingering particles are removed before the water reaches your faucet. The RO system’s combination of filtration stages guarantees that you have access to clean, great-tasting water right in your home.
Best Residential RO System – AXEON RF-4000 4-Stage RO System – System Only
Choosing the Right RO System for Your Home
When choosing the right RO system for your home, consider factors like water usage, water quality, and available space. Determine how much water your household consumes daily to select an RO system with an adequate capacity. Additionally, assess your water source to identify specific contaminants that need to be filtered out.
Next, evaluate the space in your home where you intend to install the RO system. Ensure there is enough room for the system and easy access for maintenance tasks. Take into account any existing plumbing connections and electricity outlets that may affect installation. By considering these aspects, you can narrow down your options and find the most suitable RO system for your home.
Finding the Best Location for Your RO System Installation
When determining the optimal location for installing your residential RO system, it is crucial to consider accessibility and functionality. Ideally, you will want to place the system near your main water line to ensure efficient water flow and easy maintenance. Choosing a spot with sufficient space for the system and any necessary components will help streamline the installation process.
In addition to proximity to the main water line, it is important to select a location with access to a power outlet for the system’s operation. Ensuring that the electrical components of the RO system can be easily connected will prevent any unnecessary obstacles during installation. Placing the system in an area that is well-ventilated and protected from extreme temperatures will help maintain its longevity and efficiency.
Preparing the Area for RO System Installation
When preparing the area for RO system installation, it is important to ensure that the selected location has sufficient space to accommodate the system components. Clearing out any clutter or obstructions in the vicinity will not only make the installation process smoother but also allow for easy access to the system for maintenance purposes.
It is advisable to have a nearby power outlet accessible for the RO system to operate efficiently. Ensuring that the area is well-ventilated and free from excess moisture will help maintain the optimal functioning of the system. Taking these steps prior to installation can contribute to the longevity and effectiveness of the RO system in your home environment.
Installing the RO System Components
When it comes to installing the RO system components, it is crucial to follow the manufacturer’s instructions carefully to ensure proper functioning of the system. Begin by unpacking all the components and familiarizing yourself with each part. Make sure to check for any damage or missing pieces before proceeding with the installation.
Next, start by attaching the pre-filter to the main water supply line, ensuring a secure connection. Then, connect the system’s faucet to the countertop by drilling a hole if necessary. Install the RO membrane and the post-filter according to the manufacturer’s guidelines. Once all components are in place, turn on the water supply to test the system for any leaks or malfunctions before using it for drinking water purposes.